Speedy Shipping Bar & Upsell – Configuration Guide
Welcome to Speedy – Shipping Bar & Upsell, the indispensable tool for every store owner looking to enhance the effectiveness of their promotional campaigns and upsells. With Speedy, you can effortlessly create dynamic, flexible, and precise messages to your customers through a unique feature called “Booster”.
As the cart value changes, whether it’s adding products, applying discount codes, or appearing during the checkout process, Speedy will automatically update and display relevant messages. This not only helps your customers better understand the ongoing offers and promotions but also increases the likelihood of them adding more items to their cart or upgrading their orders.
Let’s explore and harness the full potential of Speedy to boost revenue and improve the shopping experience for your customers!
For more details on how to configure and use Speedy, please continue reading the guide below.
What is Speedy Upsell Booster?
Speedy Upsell Booster is a powerful feature integrated into the Speedy app, designed to display dynamic promotional notifications based on changes in your customers’ cart value. With these notifications, you can enhance the effectiveness of your upsell and promotional campaigns while providing a better shopping experience for your customers.
Speedy Upsell Booster consists of four types:
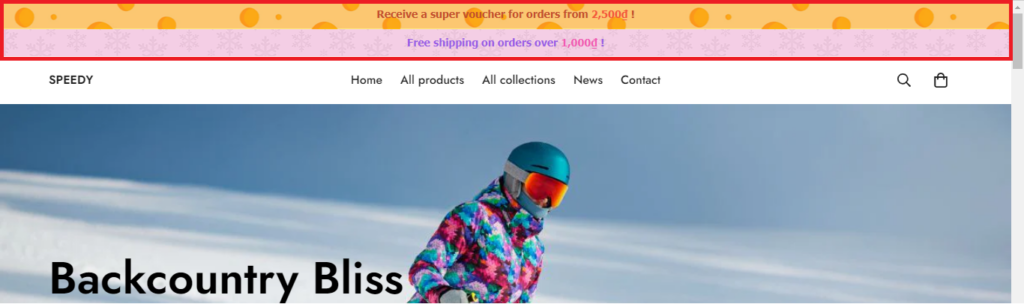
- Bar Booster: This type displays notifications either at the top or bottom of your website, quickly capturing customers’ attention without disrupting their shopping experience.
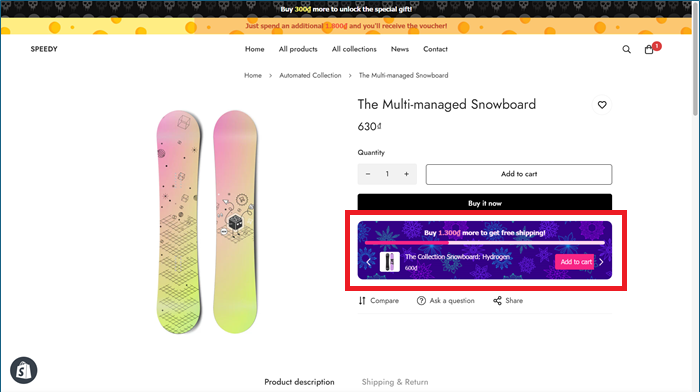
- Product Booster: Displayed on the product pages of your store, Product Booster is similar to Bar Booster but comes with an upsell slider containing a list of suggested products for upselling. This helps customers easily find and add relevant products to their cart.
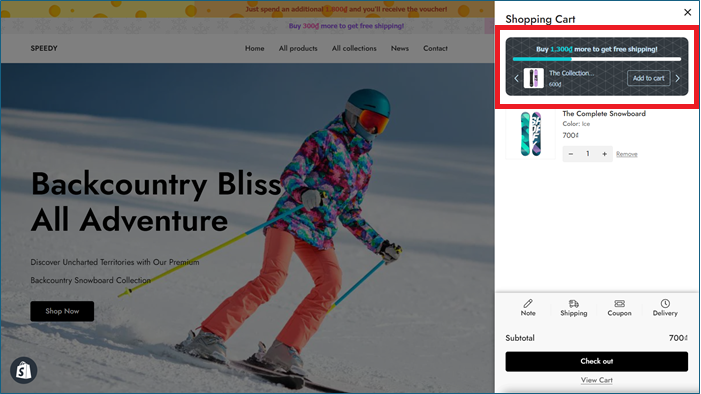
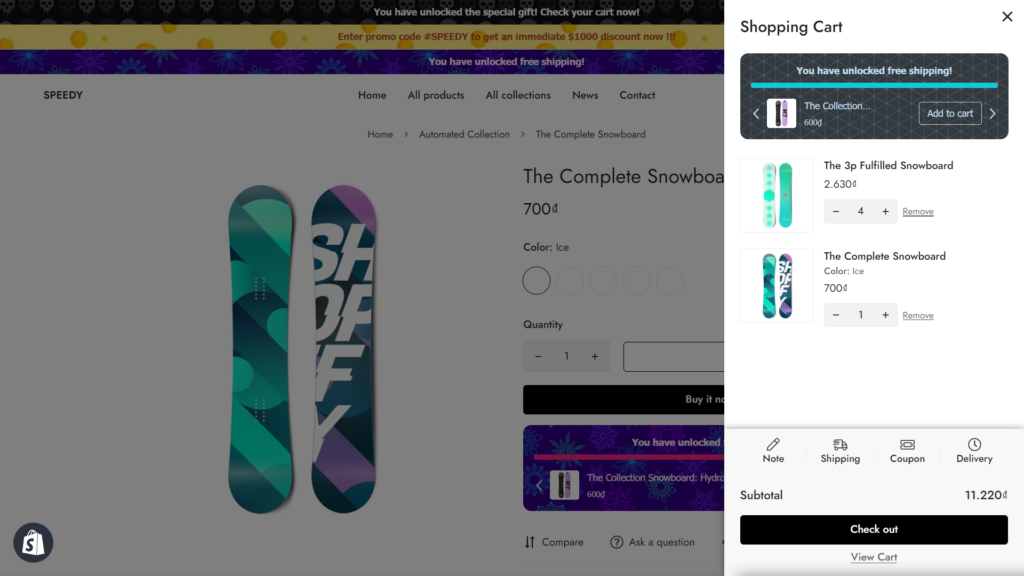
- Cart Booster: In terms of appearance and functionality, Cart Booster is similar to Product Booster. However, it is specially designed to display notifications and an upsell slider on the cart page or mini-cart.
- Group (Slider): This is a special type of booster that allows you to organize multiple bar boosters into one slider. This optimizes space on your website and allows you to display multiple promotional notifications without cluttering your website layout.
For example, we group 3 bar boosters at the top of the page, and they appear alternately in one slider.


In short, with Speedy Upsell Booster, you can be flexible and creative in creating promotional notifications, thereby increasing conversion rates and revenue for your store.
Guide to Creating Speedy Upsell Booster
*Note: When you initiate the app, if the Speedy Extension hasn’t been activated, you’ll receive a notification as follows:

To activate the extension for the app to work, click on “Enable”. You’ll then be redirected to the theme editor. At this point, activate both “TSB – CLS Optimizer” and “TSB – Launcher”, then click Save.
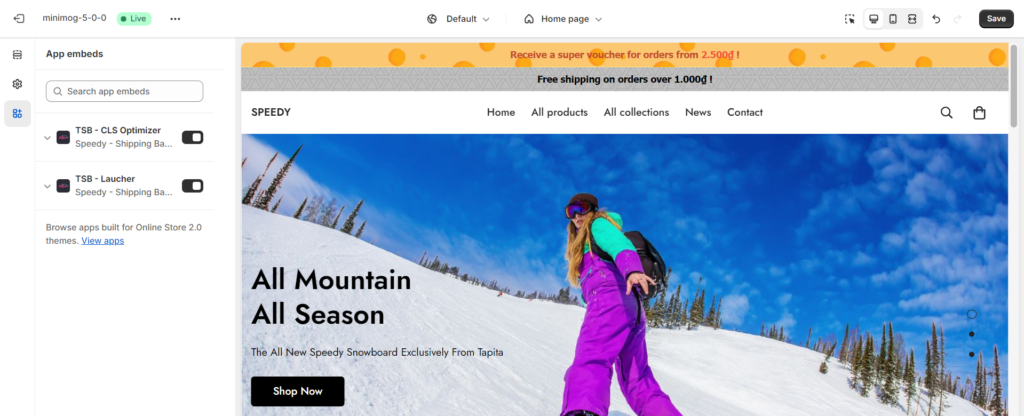
Return to the main interface of the app and refresh to update the latest status.
Now, let’s begin:
To make full use of Speedy Upsell Booster, here are the detailed steps to help you create a new booster:
Step 1: From the homepage of the Speedy app, select “Create New Booster”.
You will then be prompted to choose the type of booster you want to create, with three options available: Bar, Product, and Cart.
Step 2: After selecting the type of booster, you will be directed to the booster creation form. This form consists of four main sections:
Content: Here, you can customize the content for the promotional notification and configure other settings.
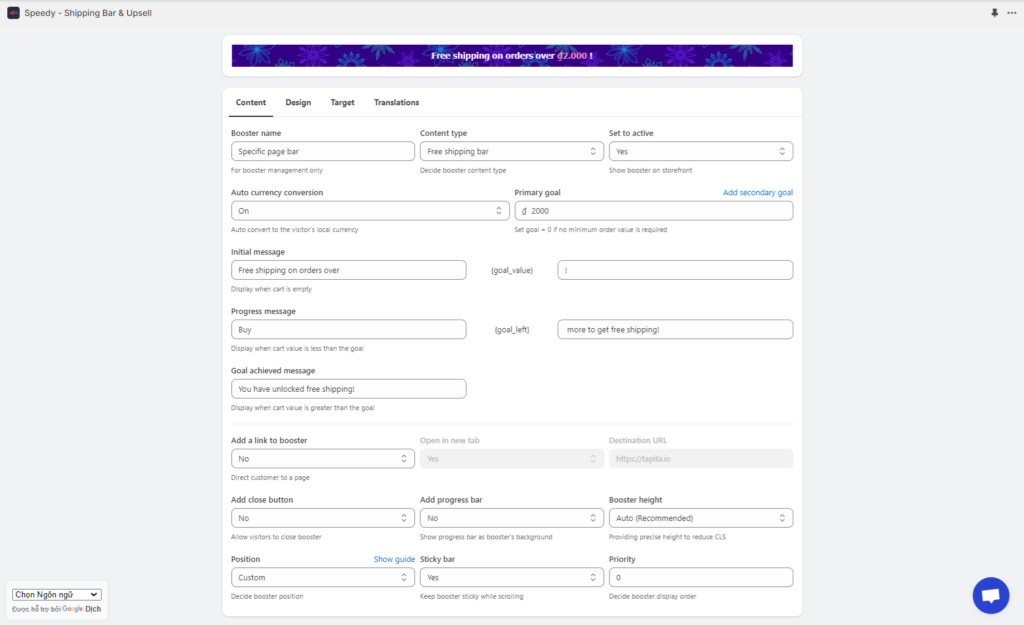
- Booster Name: Name your booster for easy identification and management.
- Content Type: Choose the content type for the booster, which includes “Free Shipping Bar” – displaying notifications based on cart value, and “Custom Content” – customizable content with rich text for you to design your own message.
- Set To Active: Set the status of the booster. You can choose “Yes” to show booster on storefront or “No” to hide it.
- Auto Currency Conversion: Automatically update the cart value in the booster when customers change the currency type on the store.
- Primary Goal: Set the cart value required to avail the offer (Level 1).
- Secondary Goal: Set a higher cart value required to avail the offer (Level 2), which should be greater than the Primary goal.
- Initial Message: Displayed when the cart is empty, usually containing information about the offer and the value required to avail it.
- Progress Message: Displayed when the cart value > 0 but has not reached the offer level, encouraging customers to shop more to reach the offer.
- Goal Achieved Message: Displayed when the cart value has reached the offer level, usually a congratulations message.
- Add a Link to Booster: Add a link to the booster. When customers click on the booster, this link will be opened.
- Open in New Tab: Choose to open the link in the current tab or a new tab.
- Destination URL: Enter the URL you want to link to when customers click on the booster.
- Add Close Button: This option allows you to add a close button to the booster, allowing customers to temporarily hide the notification.
- Add Progress Bar: Add a progress bar to show customers whether their cart has reached the required value for the offer, providing a purchasing journey overview and encouraging more shopping.
- Booster Height: Customize the height of the booster to fit your website’s interface.
- Position: Choose the display position for the booster, where the booster will automatically attach. Additionally, you have the option of “Custom Position” to freely insert the booster anywhere on the page.
- Sticky Bar: For Bar Boosters, this option keeps the booster bar in place at the top of the page when users scroll, ensuring the notification remains visible to customers.
- Include Upsell Block: For Product and Cart Boosters, this option allows you to display an upsell slider within the booster to introduce and sell other products.
- Upsell button text: Set the text for the upsell button, typically “Add to Cart” or another message suitable for your campaign.
- Upsell Products: Choose the products you want to upsell. You can select either “Specific” – choose specific products for upselling or “Recommendation” – the system automatically suggests popular or similar products.
- Priority: Indicates the display priority of the booster in case multiple boosters are displayed simultaneously.
Design: This section allows you to customize the design of the booster, from selecting colors, fonts to changing the size and display position.
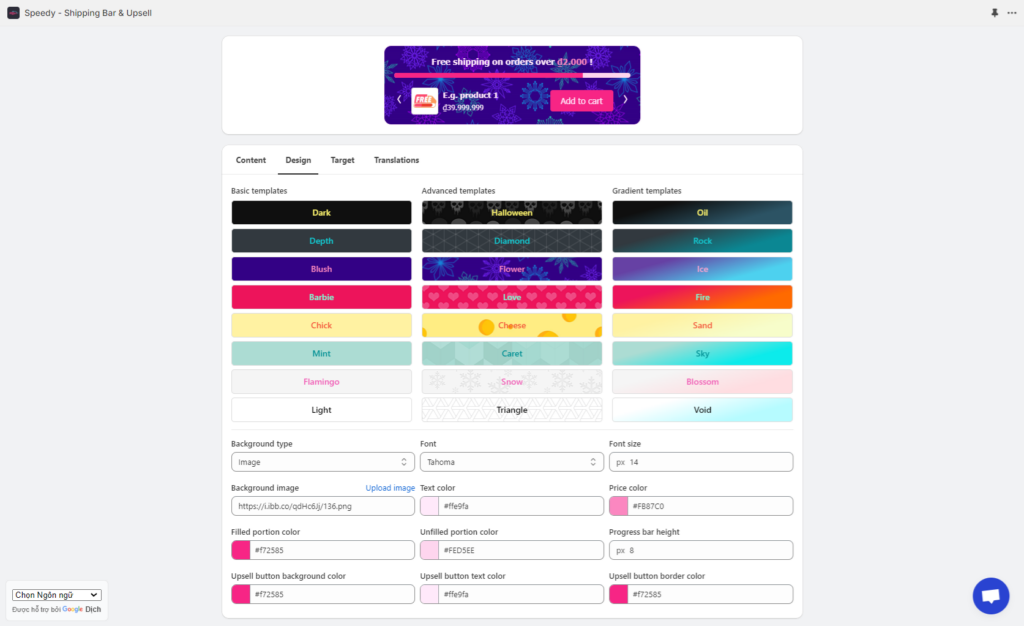
- Prebuilt Template: Choose from available pre-designed templates to save configuration time, enabling you to quickly create a professional-looking booster without starting from scratch.
- Background Type: Select the background type for the booster – Single color, Gradient, and Image.
- Font: Choose the font style for the booster’s content to match your style.
- Font Size: Adjust the font size to ensure the content is clear and readable.
- Background Color: Choose a color for the background if you select Single color as the background type.
- Background Image: Enter the URL of the image you want to use as the background if you select Image as the background type.
- Text Color: Select a color for the text content of the booster, including promotional messages, buttons, and other information.
- Price Color: Choose a color for the cart value target displayed on the booster to make it stand out and attract customers’ attention.
- Filled Portion Color: Choose a color for the filled portion of the progress bar, indicating the percentage of the goal achieved.
- Unfilled Portion Color: Choose a color for the unfilled portion of the progress bar to emphasize the remaining target.
- Progress Bar Height: Adjust the height of the progress bar to ensure it fits well with the overall interface and is easy to see.
- Upsell Button Background color: Select a background color for the upsell button to make it stand out and attract attention.
- Upsell Button Text Color: Choose a text color for the content on the upsell button to ensure clear and readable text.
- Upsell Button Border Color: Select a color for the border of the upsell button to create distinction and sophistication for the button.
Target: Here, you can set conditions to define the target customer group for the promotional notifications. This helps you display notifications accurately and effectively.
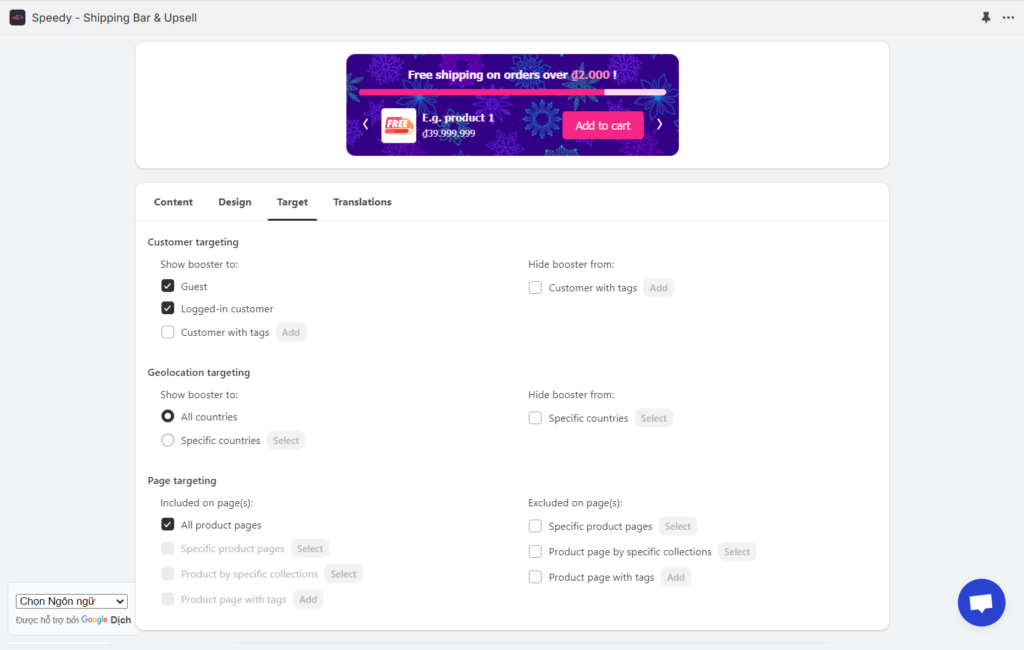
- Customer Targeting: Allows you to display or hide the booster based on customer conditions such as whether the customer is logged in or not, or if they have specific tags attached to their profile.
- Geolocation Targeting: Adjust the display of the booster based on geographical location. You can choose to display the booster for a specific country and hide it in other locations.
- Page Targeting: Customize the display of the booster on specific pages of the website. You can choose to display the booster on the homepage, product pages, or any other page where you want to promote your offers.
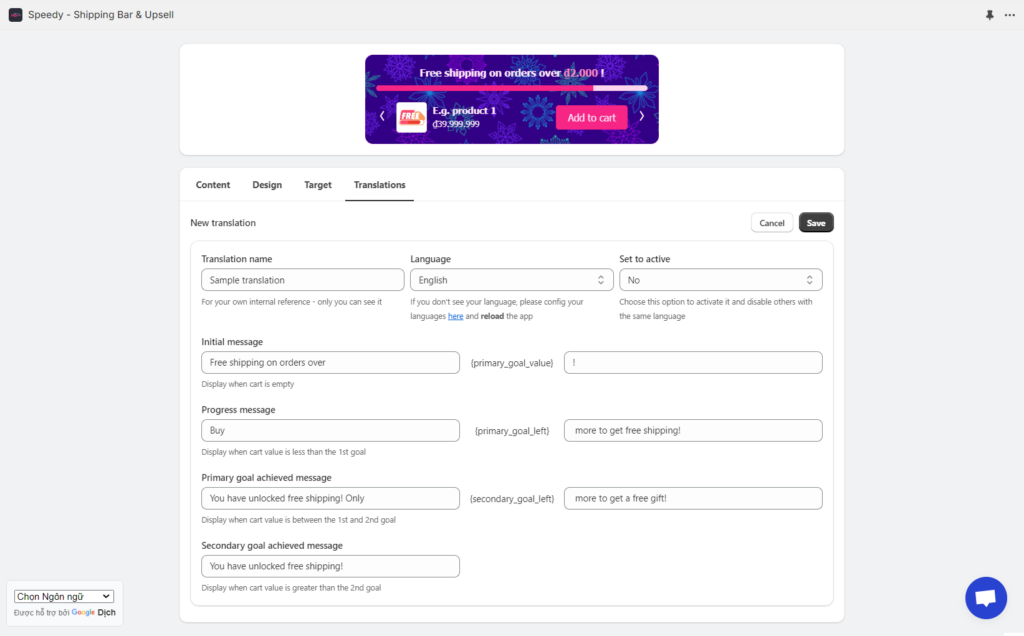
Translation: To serve international customers, this section allows you to add translations for the content of the booster, ensuring your message is clearly communicated to all of your customers.
Step 3: Complete the information for the booster, then save the settings and preview it directly on your store. Make sure that the extension is enabled with your current theme.
Related Articles
Speedy Shipping Bar & Upsell – Custom Bar Position Guide
Besides using default positions to automatically display the booster on your website, you also have the ability to customize the position individually for each booster. Just follow these simple steps: Step 1: In the booster creation form, set the ...