How to add Klaviyo/Mailchimp/Omnisend embedded form into your page
Klaviyo

You must have Klaviyo app already installed in your store
Step 1: Enable the Klaviyo app embed in Shopify
- From your Shopify admin, under Sales Channels click Online Store to open the dropdown.
- Select Themes.
- Find your current theme and click Customize.
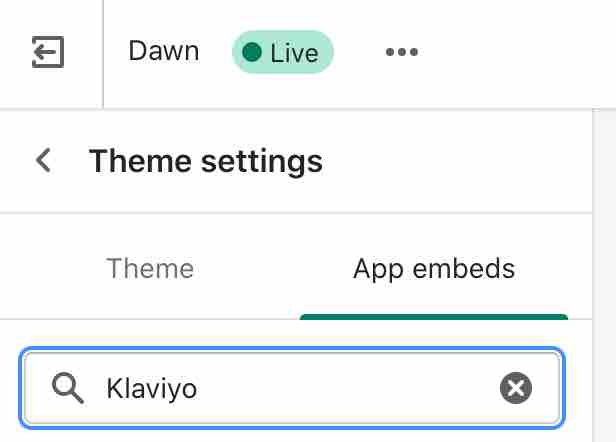
- In the left hand menu, select Theme settings.
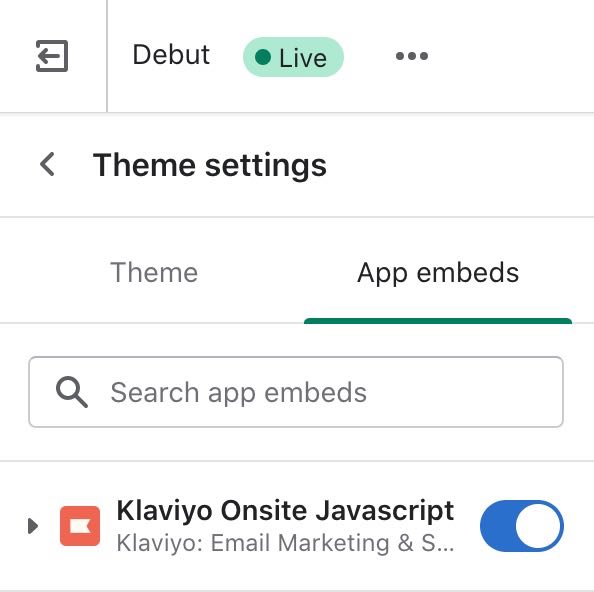
- Click the App embeds tab and search for “Klaviyo.”

- The Klaviyo app embed will appear in the list, because you already installed the Klaviyo app while integrating. Make sure the app embed is toggled on.

- Click Save.
- To check that your app embed was toggled on correctly, navigate to the Integrations tab in Klaviyo.
- Click Enabled Integrations and select Shopify. You’ll be brought to the integration settings page.
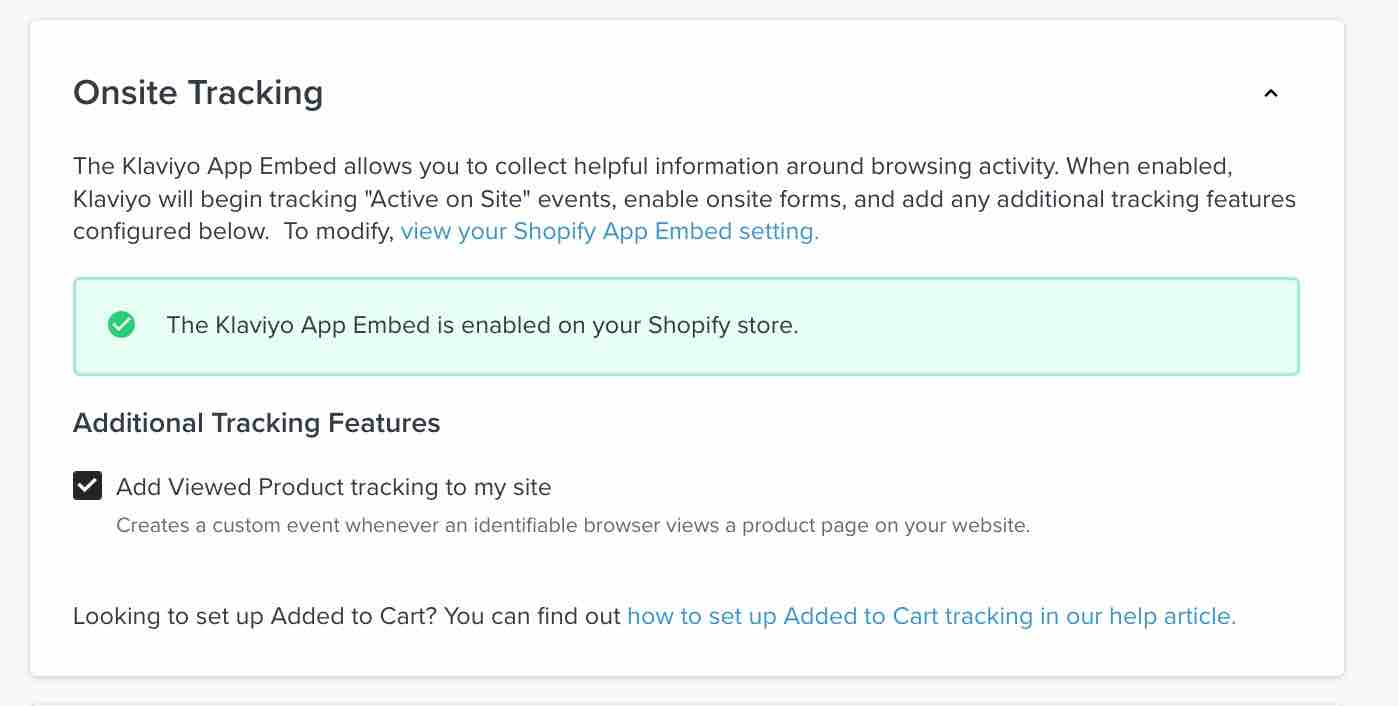
- Here, you should see a message calling out that your Shopify app embed is enabled, and the Viewed Product setting is checked by default.

Step 2: Copy your form's embed code
When you publish an embedded form from your Klaviyo account, after selecting publish, you'll see a popup with your form's embed code.

You can also get this code by opening your form in the editor and clicking to Behaviors tab. Copy this code and use it to add the form to your site.
Step 3: Add the embed code to your page
Add a Custom HTML element to your page where you want the form to appear. Then, paste the embed code above into the HTML Content.
Done! Now you can preview or publish your page.
Mailchimp
Step 1: Generate embedded form code from Mailchimp
1. Click Audience, then click Signup forms.

2. If you have more than one audience, click the Current audience drop-down and choose the one you want to work with.
3. Select Embedded forms.

4. Click Form Fields, Settings, Tags, or Referral Badge to customize your form.

5. When you’re ready, click Continue.

6. Click Copy Code.

Step 2: Add the embed code to your page
Add a Custom HTML element to your page where you want the form to appear. Then, paste the embed code above into the HTML Content.
Save your page and done! Now you can preview or publish your page.
Omnisend

You must have Omnisend app already installed in your store.
Once you have customized your form, you need to copy the code provided and launch the form.
Add a Custom HTML element to your page where you want the form to appear. Then, paste the embed code above into the HTML Content.
Save your page and done! Now you can preview or publish your page.
Related Articles
Can I add "attach file" option into my form?
If you want to have the option of file attachment in your form, you can use this app to build the form, and then add this form into your Tapita page.How to configure Contact Form block
Tapita Page Builder allows you to build contact forms using the following options: Using the Contact Us page templates Using the Contact Form block Build the form fields from scratch using the Forms elements Either way, there are only 2 steps you ...How to add a Google Maps box into your page
This tutorial will show you how to add a Google Maps box into your page like in this template: https://pwacart.com/a/tapita/preview/pages/maskedId/1sSFkeZCoaCxXFVJxeeOV1639043382 Embed from maps.ie First, add a Custom HTML element into your page. ...How can I select specific products to add into my page? (Old version)
When you add Products Scrolling or Product Grid into your page, you are able to add products by category or select specific products. To select specific products: In Products Scrolling/Product Grid configuration, go to Product Source > select ...How to create an Email Subscription form
This tutorial will guide you to create a Store Email Subscription form similar to Shopify default one. Then you can put this form into any page you like. Shopify’s default subscription form Use the Store Email Subscription block In Tapita page ...